Friday, October 31

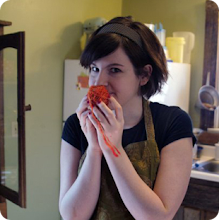
My first stitch markers

...and they were so fun to make! Here they are:
These will be my first Etsy item. Want to buy them? They're yours for eight dollars! I'm working on a fun way to package them up. I already have five other sets ready to go; I just need to get some pictures of them. I'll have them up soon!

Tuesday, October 28

A very selfish post indeed :)


I'm quite earnestly trying to win this hat from: Shana's music, writing, etc etc etc. A link back to her giveaway post gets me two entries so... here it is, Shana! I've got my fingers crossed. :)

I have an Etsy store!

...well sorta. :) It's there, set up and ready to go, but nothing's on it yet. But still, it's exciting! Hopefully before the year's out I'll have a few goodies up for you to see (and buy)!

Monday, October 27

Blog Name Change!

First things first, I'm listening to my first Christmas song of the season! I know, it's not even Halloween. But it IS, however, like 30 degrees outside. So I'm justified.

In other news, I've changed my domain name to The Green Acorn. I figured Memoirs of a Bride doesn't really suite the purpose of this blog since I'm really focusing on my crafts. The Green Acorn is a good representation of my local area, nature, crafts, and will easily transition to an online store, should there be one in the future.

So don't be confused! It's all the same, just a new name. :)

Handmade: Stitch Markers

Rather than putting each new handmade idea in one enormously long post that gets lost in the archives, I'm just going to start a new post for each idea as I come to it. I'm not sure yet if I can get a categories sidebar or not... either way from here on out all the DIY accessories will start off as "Handmade: 'subject' ".

Today's handmade idea: Stitch markers!


Not-required-but-oh-so-helpful-prior-knowledge-to-have:
        A prior dabbling in jewelry making. A little know-how in this area will make this project easier.
        A familiarity with polymer clay. Again, it's not necessary, but knowing a little something about it (how it handles, fun ways to mix colors, etc.) will make the process smoother.

Materials:
        Polymer clay OR Beads from your local craft store
        Tiny glass beads (optional) to finish the look
        Drop earring posts (called head pins or eye pins) - these are basically straight pins with the point cut off. You'll use these to secure the marker to the ring.
        Split Rings - size to fit your needles.
        Needle-nose pliers or a set of jewelry making pliers

To Make:
        With your clay, fashion a marker however you'd like. Mind your size, though, you don't want too much added weight on your needles! Ideas? The sky's the limit! You can make anything! Hearts, dogs, circles, flowers, snowflakes, mittens, socks, cats, rabbits, squares, triangles, weird shapes that don't have a name, mushrooms, leaves, faces, candy corn, anything! Just have fun and go nuts. Nuts! You can make those, too.
        Carefully push your earring post through the bottom up through the top of your marker, stopping once the end is flush with the bottom of the marker. Now, you have two options here: you can find a way to suspend your markers while they bake so they won't get flat on one side, or you can lay them out on a cookie sheet so they will. My suggestion: lay them out. One flat side can actually be a benefit so that your markers lay flat against your knitting and don't flop around so much.
        Bake your markers (with post still in) according to the clay instructions. Take them out and let them cool. If you want, now's the time to add a little bead or two to the top of the marker. It's a pretty little touch.
        If your post is particularly long, you may want to snip a little off. Just leave enough length on there for the pliers to bend the tip into a circle.
        With your needle-nose pliers, pinch the very end of the post and slowly wrap the post around the tip of the needle. You should have a small circle that's not quite closed all the way. Take your "ring" and slip it through that opening. Almost done! Your marker should now look like a marker! All you need to do now is close that gap in the circle you made so your ring doesn't ever fall out. Simply pinch the ends together with your pliers and you're done!
        Now - if you'd rather have pretty beaded markers, throw out all the steps involving the clay, add your beads, and pick back up on the pliers step.

Friday, October 24

Handmade: Quaker Rib Afghan

This design can hardly be called my own since Quaker Ribbing has been around for eons. However, I've made it into a blanket whose stripes run opposite of your normal rib pattern. I think it's lovely.

Materials:
Any size yarn (I used Yarn Bee Luscious, a bulky weight - some of the most deliciously soft acrylic your fingers will ever feel!)
Circular Needles to match yarn size (I went with 8mm/US 11 circulars)
A cozy place to sit and enjoy!

Pattern:
Cast on as many stitches as you'd like for the length of your blanket. With my bulky yarn, I cast on between 100-150.
KNIT rows 1, 3, 5 and 6
PURL rows 2 and 4
KNIT rows 7, 9 and 11
PURL rows 8 and 10
KNIT rows 12 and 14
PURL row 13

Esentially,
K P K P K K
K P K P K
K P K

And repeat! 
Keep going till you've got yourself a nice sized blanket. And really, I do suggest this yarn. The pattern gets a little lost since the yarn has some flyaways, but it is so so snuggly soft.

Tuesday, October 21

Handmade: Creating Knitting Charts in Excel

Woah! This was a great read I found over at the Create Along blog. Wanting to make your own charts? Here's a fail-safe way to make that happen.

Someone's been a busy blogger today. Now it's time for bed. :)

Monday, October 20

Handmade: Fun Knitting Accessories to Make at Home

Most knitters I know have to plead with their dear husbands just to get a few skeins of yarn. But a few skeins of yarn, new needles, a spindle, a couple ounces of roving AND sock blockers? Don't make me laugh.


Not to fear, fellow knitters! Plato wasn't just knockin' around when he said necessity was the mother of invention. Being a newlywed and living off freelance work - it's not hard to imagine we're all but broke most of the time. :) So here we have it then, a fun little list of things to pick up at your local hardware store, guaranteed to provide you with years of delight as you work with your one-of-a-kind creations! Oh, and for pennies on the dollar.

Ahem:

NEEDLES WORTH BRAGGING ABOUT
You will need:
Dowel rod, choice of size (carry a needle gauge with you to find the
right match)
Any brand modeling clay that you bake to harden
Sandpaper
Wax Paper (optional)
Mineral Oil or Wood Oil (optional)
Wood Stain

To make:
Cut the dowel rods to suit your desired length. Using a knife or coarse sandpaper, shape the point of the needles, then follow up with a fine grade sandpaper to smooth out any snags or splinters. If you choose, stain the rods at this point. (If you do stain them, play it safe and let them dry overnight.) Next, rub the rods down with a wood oil and/or wax paper. This will polish it up nice and condition the wood.
Now for the fun part. :) To make the stopper at the other end of your needles, take your clay and fashion an end - any shape or color will do! I've seen acorns, balls, tear drop shapes, bells, the sky's the limit. Just don't make it too big otherwise you're hands will be begging for mercy halfway through your mother-in-law's Christmas scarf. After you have your shape, carefully push it onto the flat end of your needle, far enough down to make a good hole to which you will later glue the rod. (But not too far! You don't want your new needles poking out the end!)
Following the clay baking instructions, put the needles - rod, stopper and all in the oven with the stopper hanging over the edge of a baking sheet so it doesn't flatten out while it's cooking. Once they're done, give them some time to cool off. Remove the stopper from the needle, drop some good glue down in the hole you made (a tacky craft glue will do), reattach, let the glue harden up (overnight would be great) and tada! Needles worth bragging about.

*note: if you want to make dpns, shave off the other end to a point, smooth and oil it down, and you're set.

**Instructions taken from here


YOUR VERY OWN DROP SPINDLE (NOT AS BEAUTIFUL AS THESE FROM KNITTING IN COLOR BUT...)
You will need:
2 CDs
5/16" dowel rod, 12" long
Blind well nut (at Home Depot, the part number is 127253) - the brass threading must be safely cut off.
5/8" rubber grommet (Home Depot part no. 161788)
Eye Hook (can be found in picture hanging supplies)
Needle Nose Plyers (to open the eye hook a little so thread can move in and out easily)

To make: (Assembly instructions taken directly from here)
Press the rubber grommet into the center of the pair of cds and then insert the blind well nut into the grommet. There will be a groove between the blind well nut and the grommet where later, you will be able to attach a starter string.
We applied soft glycerine soap to the shaft of the spindle to facilitate insertion into the blind well nut. Keeping the 'groove above the grommet' on top, the point of the spindle was inserted from the upper side. The disks were pushed 1/4 of the way up the spindle to create a low whorl spindle. (for a high whorl spindle, keep the groove on the bottom and push the disks 3/4 of the way from the bottom of the spindle. The eye hook was inserted into the flat end at the top of the spindle.

P.S. The site where the instructions came from (linked above) also gives some great pointers on getting started with your new spindle. New to spinning? Check it out! As always, YouTube is an invaluable resource for us visual learners.


HOMEMADE WOODEN DROP SPINDLE
If I think to later, I'll actually write out the steps. In the meantime, however, just visit this link. It gives clear and detailed instructions on how to make a really neat drop spindle. I think I'm going to make it my next project.

YOU WILL NEED:
1/4" wood file
2 3/4" wood wheel w/ 3/8" hole
3/8" dowel rod
Wood saw
Ruler
   Hammer
Wood Glue
Pencil Sharpener or Knife
Sand paper, coarse to very fine
Fine steel wool
 Polyurethane Finish

A Wishlist

This is the best way I know of to keep track of all the wonderful things I see online that I would like to someday own. Blogger has a wishlist section, but users can only add items that are sold online with a direct link. While that's great, I can't add obscure items like "Heather grey sock yarn" and such. So here I go (in no particular order)! Hope you're reading, Mom! :)

  • A pair of wooden sock blockers (like these) with my initials burned in by the lovely Miss Sisk. :)
  • A pair of fun knitting needles. The ones I have now work, but they're not special. :) Hobby Lobby sells some really lovely dark wooden needles, like these which are Surina wooden needles. Any size is fine!
  • The book "Start Spinning: Everything You Need to Know to Make Great Yarn" (check out Amazon)
  • Roving! A must for any spinner. I know, I know, I'm not a spinner yet, but that's where you come in. :) Romney, Corriedale, Coopworth and Shetland are all good types of roving for new spinners (Like the Romney roving found on this page). Anything from 1-10 ounces would be great! As for color, a white or cream so I can dye it. 
  • Wilton Cake Icing - for dying my homespun yarns! Any and all colors are welcome. :)
  • A mannequin head - to model my hats. Oh, and maybe it can be attached to a bust to model scarves and sweaters? Who knows. Maybe a shop somewhere is going out of business. :)
  • A wooden yarn winder
  • "The Gentle Art of Domesticity" by Jane Brocket - it's amazing.

Dreams don't die

I can't remember being this motivated and excited. There's so many thoughts rushing through my mind right now I can hardly keep up with them! Couple that with trying to type them out... well, we'll see what we get.

I love knitting. And crochet, for that matter. These two things have provided me with more fun and learning than anything else in my entire life. Three years into it, and I'm just starting to unwrap the unending gift that is the art of knitting. And that's just what it is: a gift. It is vast, colorful, timeless, beautiful, a treasure, and loads of fun. It is challenging, rewarding, soft, warm, and a companion. I know now I will never leave it. I will undoubtedly spend the rest of my life exploring this craft, learning more and more as the years go on.

This truly is a revelation. I'm a graphic designer by trade. But to be honest, it is not my passion. I told Victor earlier today that for me, graphic design is like playing the flute in middle school. I never had to try very hard, but I was still 1st chair for three of my four years there. I find my work now to be much the same. I feel a sense of duty to give these organizations something genuinely great to promote their efforts, but there is no passion. I just want to do something more girly! What motivates my designs is duty, which is alright, but I have been so starved for passion and girly-ness lately. (Just on the work front, mind you!) ;) As a woman, especially a woman of many emotions (to which my dear husband can readily attest) it is hard to keep designing when you don't "feel it".

And here, for three years now, have been my ever-faithful knitting needles, sitting cozy in a corner, waiting for me to come pick them up and escape with them to the recesses of my dreams and imagination. When I knit, I escape. Ask anyone, when I'm knitting, all is well. I am at peace (don't I sound like such a hippie??) :P But it's true! It is truly a woman's craft. It is my craft. And today, just now, it hit me: I can make a career out of this. But how? Why? Where do you start? How will you pay for it? - there are tons of questions. But I'm ready to take them on. And I'm ready to design things that are outside of the advertising arena. I want to be more of the artist I see when I'm dreaming!

Never before have I loved something I do so much. I've told so many people that graphic design is my passion. I just knew that if I wanted badly enough for it to be true, it would be. The passion isn't growing - the frustration is. I like it, and I like what I produce, but that's all. I just like it. This isn't a marriage or even a relationship. I have no obligations to graphic design, despite the fact I've been telling my self I do, that it's where I am, where I'm going, and what I'll be doing forever. I'm free to leave! I'm free to chase my dreams! Do I spend my spare time researching ways to better my design? New trends? What the big dogs are designing? No. I knit. I read knitting books. I go to the library to learn more about...knitting. I spend countless hours reading about hand-dyed fibers, where they come from, what the people who make them are like, where to go to learn even more - this is where I spend my time. I am finding myself more and more detached from my design work and more and more attached to my knitting. But you know, it could be tied to the fact that I'm not designing things that interest me personally. When I knit, I knit what I want to knit.

This is a dangerous post, I know. No doubt people who employ me will read this, but it's about time I take a big step towards what I want to do. Otherwise, I might end up in my 40's with a family who wonders why I'm so distant and a job I hate - wondering what life would be like had I just pursued my passions while I still had the chance. Dreams don't die. Initiative does. And while I have both, I can't stand here and do nothing.

Victor and I are so poor right now. But we are both chasing after the things that make us feel alive. We have our dreams, we have initiative and we certainly have each other. And through all of this, the good Lord still provides. I think He thinks we're on the right track.

Wow, that's a load off.

Monday, October 13

Home!

You know, it didn't even cross my mind to write a brief post before heading out for the week. My family (Victor, mom, dad, Dickie, Donna, Matt, Katie and the boys - plus dogs) all headed down to Gatlinburg for a much-needed family vacation. We went last year and had such a blast that there was little discussion about wether or not we'd come back. We did, and it was just as grand. Vic and I were able to snatch some real winners (pictures, that is) that I hope to post soon. I think one of the best parts was just having our dogs with us. There were actually two beds in our room, so the puppies got their very own. :) I think they really enjoyed sleeping close to each other. Once Audrey is big enough not to fall through the railing in the loft, we'll let her sleep out of her crate with Ava. They really are something. Anyway, long story short, the trip was great. Oh, and I started work on my first glove. I'm frogging it, simply because I learned several things as I went along that I'd like to do over. Pictures of that to come soon, as well. :)

P.S. Grandmommy, the breakfast casserole this morning (was it just this morning that we had breakfast at our cabin in Gatlinburg??) was a hit! It was delicious. :)

Tuesday, October 7

Finally... a home for my needles.


I was about fed up with keeping my needles in ziploc baggies here and there, not knowing which project bag which needles were in, but mostly not having a fun place for them to call home. The other night I was rummaging through Ravelry's patterns (www.ravelry.com - the best online knitting/crochet community the world has seen - it's in Beta phase, so you have to request an invitation, but it's well worth the four day wait) and I came across a crochet clutch that really caught my eye. It was just what my needles needed. Complete with lining instructions! I was able to finish it in just two nights, which was a thrill. I'm an instant gratification kinda girl, so it was nice to finally knit up something that didn't require weeks and weeks of work. :) Grandmama, if you're reading this, note the button: it's from your mom's button bag that came with the White sewing machine! 

-Enjoy the pictures, they were fun to take!

Monday, October 6

Oh, my!

Just found this website - www.signatureneedlearts.com - whew! How do you like them apples?? These needles are gorgeous! I can imagine having one of their accessory bags filled with all the different pairs... ah... Oh, I'm sorry, did I forget to tell you how much they are? THIRTY-FLIPPIN'-DOLLARS! For a pair! Still... I'd love to know if they knit as amazing as the makers claim they do. They sure are pretty!

In other news, the family vaca' starts Thursday, and we're so pumped. After all, knitting and Gatlinburg are two peas in a pod! I'm so picking up some fun yarn while I'm there.

And guess what else? I just found out that my Aunt and Uncle (and kids, too!) are coming next Spring all the way from Washington to see us! Eeee! I'm so excited. We never get to see them much (naturally) so I'm stoked to get some time with them! Maybe I can teach the girls to knit while they're here... ;)

Sunday, October 5

Teehee...

I like having a blog...

Saturday, October 4

Fortissima Socka


 I did it! It's done. Well, at least three-quarters done. Marie helped me get through sock one, and I've managed all the steps on sock two! The hardest part has been turning the heels. With that behind me, it's smooth sailing down to the toe! I think they've turned out quite lovely. My goal for pair two is a girlie-er pair, maybe with some lacey work.
It's just been fun knitting something with shape. Oh! And working on two circulars? A breeze. There's less joining, more fun. DPN's are so overrated. :P

Parties and Purls


Friday was a blast. We had a surprise bash for Katie - several of her gal pals showed up at California Pizza Kitchen for dinner and then all headed over to Homewood Suites for a sleepover! The details and effort involved in planning this were amazing. Oh yeah, I forgot to mention the great part: this whole thing was planned by her husband! He got major brownie points. He packed her all up, got all of her makeup, jammies, everything! Down to contact case! We all had so much fun. Once we were all tuckered out and ready for bed, I got to sit and talk to baby Caleb in Rae's belly. It was one of the most memorable things I have ever done. Who can't believe in a Creator?? I got to feel his little head, and even felt (and saw!) his hiccups. I can't wait to be pregnant. I mean, the time will come one day, and I don't want to rush it, but oh I look forward to it so much. I'm so glad God gives us nine full months to stare at our growing bellies in wonder. I can't wait to meet baby Caleb.

And then today, after waking to a marvelous breakfast with the ladies, I headed back to C-town for my knitting class. Maggie has been coming with me, and holy knitting Batman! She's amazing! She learned to purl today, and her little pink scarf is coming along so amazingly well. She's only eight! My niece is now my knitting buddy. How fun!

Thursday, October 2

You cannot defeat me!! (and a poem too)


I'm happy as a schoolgirl... a couple of hours designing and getting it online, and my background is complete! Muahahaha...

In other news, I found a poem I'd like to share, in honor 
of, well, my background and my sister's Queen Anne's Lace Scarf: 

Queen Anne, Queen Anne, has washed her lace
(She chose a summer's day)
And hung it in a grassy place
To whiten, if it may.

Queen Anne, Queen Anne, has left it there,
And slept the dewy night;
Then waked, to find the sunshine fair,
And all the meadows white.

Queen Anne, Queen Anne, is dead and gone
(She died a summer's day),
But left her lace to whiten in
Each weed-entangled way!

Mary Leslie Newton

A Brave New World

There is so much to do! My camera has been out of service since late March (!) because the battery died. It's only about $30 to get a new one, but I'm not one to sit down and actually order the thing. I always tell myself there's so many other, better things to do. Looks like I have to get it now! After all, what's a blog without pictures?

This blog, assuming I pursue it like I hope to, will largely serve to document all the things I make. Let's see how it goes!

Always,
Krista