Tuesday, January 13

Catching up

I knew it had been awhile since I'd been on, but a month and a half?? Good grief. Post-holiday life, as best I can tell, is back to normal and resuming it's regular (all be it freelance) schedule. Sitting next to my mouse is my first (and very untrained) watercolor painting, a crochet baby dress upstairs in the works, and an impromptu Filipino (can you believe that's spelled right?) dish in my tummy. (Got the noodles from the local asian market - they're called Pancit Canton noodles.) It was delicious. Needless to say, new things have been happening around here.
But for starters, what about this Japan trip? Oh my goodness, it was absolutely amazing. That sounds too light and empty - it was, where are the words? It was truly a trip to be remembered. Victor and I didn't sleep in the same bed once on the
 trip since all the rooms we were in only had two twin beds... it was funny. We felt like Lucy and Ricky for sure. Tourist-wise, the trip kept us on our feet. By the end of the first week, I'm almost certain 30% of our time was spent traveling by train to different cities. Mitaka, Takamatsu and several others - and we only stayed two days at most in any location! I feel like we really got to see a lot. Just like any modern country, in the big cities everyone dressed to perfection each day, had just the right hair and shoes, and always had a shopping bag or two in each hand. And the subways? Don't even try to imagine crowded until you've been in Tokyo's sub system right after work on a Friday. :) Once you travel outside of Tokyo (and this takes a couple hours since it's so vast), the people are waaay more toned-down. More basic clothes, less flashy accessories, etc. Needless to say I felt more comfortable outside of Tokyo, but still had a blast while we were there. I just wanted to SHOP all the tim
e! And Mt. Fuji - it's even more beautiful through train glass than I could have ever imagined.
On a deeper level, I discovered that the divides between Japanese and oh, I don't know, THE REST OF THE WORLD, are innumerable. I mean it. You think because it's a modern country the people are like us - my goodness there's little comparison. Mannerisms, philosophies, world views and even basic thought processes are vastly different. No doubt you've heard about the history of Japan and it's shame-based origins - apparently no amount of money or technical developments will ever remove this. The Japanese struggle very much with outside opinion, to the point that approximately three times a week the train systems are halted by a man or woman jumping in front of them. The Japanese are not quick to trust, but are the most polite people I have ever known. They are ritualistic to a fault, but loyal as anything you could ever imagine. And this: not even ONE percent of them claim to be Christia
n. I had no clue! There is so much going on in Japan, and I want to be a part of it. So does Victor. We have no idea where we'll be in the next few years, but maybe it will be there! The children there are precious, and the churches there are so rich, though they struggle. It has to be the most complex experience of my entire life. I have some of the pictures up on my Myspace and Facebook if you care to look.
Now, about that watercolor...
What do you think? I sketched out the picture before painting it for two reasons. One, I like the look of pencil with watercolor. And two, I have ZERO confidence in my freehand painting skills. Pencil erases, paint doesn't. :) As for materials, a little Crayola watercolor pack from the kids section at WalMart and some cardstock did the trick! I really enjoyed painting again, and the watercolor in particular was fun.
Oh, oh, oh!! I totally forgot! I am IN LOVE with hot and sour soup (you know, that brown funny-looking soup at Chinese buffets) but have not been able to replicate it at home to save my life. And then I found it: the perfect hot and sour soup recipe, and my heart (and tummy!) is so happy. I'm going to write it out anyone else can reading can try it out. It's really easy, and pretty cheap. Here we go:

Chicken broth (two cans will feed 4 easy)
Soy Sauce
Rice Vinegar (the secret lies here - don't use regular white vinegar. You thank yourself later.)
Tofu (I used silken tofu, but it turned out to be borderline too soft. It worked fine, but I think something firmer would be better.)
Pork (the thinnest chops you can fine work best)
Black fungus strips (I haven't used these before since I don't really know where to find them, but I LOVE them in the soups at restaurants. If you really want mushrooms in your soup and can't find these, just use shiitake or any other variety you like.)
Bamboo shoots (don't worry about these little guys, they are virtually flavorless once cooked but add a nice *crunch* to the soup. You can find them canned in the asian foods section of your grocery. The water they soak in smells VERY green - I hate it to be honest - so I rinse them before adding them to the soup.)
Water Chestnuts (my own addition - another flavorless food that adds great crunch. Optional.)
Crushed red pepper (the seeds and flakes, not the powder)
Egg
Corn starch
Spring onions for garnish

Now for the fun part:
Bring your broth to a boil. While it's heating, add soy sauce to taste. "To taste" may sound too vague for more exact cooks, but hey, it's how I roll. :) Just remember that hot and sour soup is full of flavor but not too salty. Somewhere in the neighborhood of a quarter cup sounds about right. Surely not more than that. I would start with less and add more.
While that's heating to a boil, start cutting your pork into tiny little strips. We're talking like 1/4" wide and 1" long. This is where having those thin chops come in handy. The goal here is to allow you to get a little bit of everything in each bite, so smaller pieces are ideal.
Start browning them, cooking them through on medium heat with just a little salt and black pepper.
Once your broth gets boiling, mix up some corn starch and cold water to add to the mix to thicken it up. Some people prefer and thick hot and sour soup, others like it thin. I personally like it right in the middle of the two extremes, and use three or four heaping tablespoons of cornstarch.
Once it has thickened to your liking, turn it down to med lo heat and add your crushed red pepper.
Check on your pork - if it's cooked through, add it to your soup.
Take your bamboo shoots and chestnuts (if you used them) and cut them into small pieces. My best advice for the bamboo is to cut it lengthwise into thirds or even quarters. It takes a little extra effort since you can only cut those little boogers one at a time, but again, it's well worth it. :) Toss 'em in the pot to cook, still on med lo heat.
Cube your tofu, as much as you'd like in your soup, and add to the mix.
Add your mushrooms.
Wisk together two or three eggs (depending on how much you like this part - I love it, so three for me). Slowly guide the egg down the end of a fork or a pair of chopsticks into the soup, working around in a circular motion so that the egg doesn't pile up in one spot. Let it sit for about 30 seconds to firm up and make those lovely pieces we all associate with hot and sour soup, and gently stir.
I've read that you're not supposed to boil the vinegar and that it's best to add it last. So I do. You can either add it to the whole batch to taste, or pour a little in each serving bowl. Add the soup, top with your cut spring onions, and voila! Some might good hot and sour soup that very closely resembles the yummy stuff from buffets. The only difference is YOU made it, you know exactly what's in it, :P and it's fresh. Oh so good.

Friday, December 5

Where have I been??

Obviously everywhere but here. Well, not even that many places. Just busy. It's Christmastime after all! :D

I just felt like I should give some sort of update - one, that I have new items up on Etsy and two, Victor and I leave Thursday for Japan. Eee!

Friday, November 21

Good grief.

Say it just like Linus from Charlie Brown. "Goooood grief." Where is my time going? I don't even leave home most days and STILL it's slipping through my hands! Agh! The Christmas Season MUST be fast approaching. This is the only explanation. And I still have a trip to Japan to plan and pack for! It is a good thing indeed to have a husband. I just hope that before the year is over I'll have made it to my knitting class!
On a lighter note, I found my little Kodak digital camera hiding in one of my cleaning baskets (??) so now I'll have a handy camera to take with me around Tokyo when that five-pounder camera just won't do. :)
Well, it's time for lunch and back to work! I will say this though, it's lovely having iTunes. I've got my 21.7 hours of Christmas music playing all day in the background. It's awesome.

We will return to our regularly scheduled programming in January. :)

Friday, November 7

Ugh

My blog has apparently gone mad. I've lost all my sidebar information! Drats! It's in a transition phase... yah... :) It'll be back to normal soon, I hope.

Sunday, November 2

Eeeee!

I'm on some sort of natural high right now. I know it. I keep squealing and giggling and clapping my hands... or maybe I'm just a really silly woman. But there's a great reason: I just completed my first two purchases on Etsy! That's right! Less than 24 hours on the market and two have sold! This is too awesome. I opened my mail tonight after Victor and I got home from an (amazing) afternoon at Mom and Dad's to find two emails confirming orders from Etsy. I squealed. THEN I got two more from Paypal saying, essentially, "Congratulations. We've just dumped money into your account." Sure, it's only $22, six of which will go to shipping tomorrow, but it's a start! And an encouraging one at that! Nothing's bringin' me down tonight! I'm all smiles. I want to do something special for my first buyer. I mean, it takes a little bravery to buy from a seller who has 1) no feedback and 2) no selling history. I'm so thankful for her! Maybe an extra set of markers? I don't know. I'll think of it. Right now, though, I've got to come up with a clever way to ship these. After all, it's not every day people get a package in the mail. It should be special.

Well, good night! I've got so much to do!

Saturday, November 1

5 items for sale on Etsy

Got my first handful of items up on Etsy! Go have a look!

Friday, October 31

My first stitch markers

...and they were so fun to make! Here they are:
These will be my first Etsy item. Want to buy them? They're yours for eight dollars! I'm working on a fun way to package them up. I already have five other sets ready to go; I just need to get some pictures of them. I'll have them up soon!

Tuesday, October 28

A very selfish post indeed :)


I'm quite earnestly trying to win this hat from: Shana's music, writing, etc etc etc. A link back to her giveaway post gets me two entries so... here it is, Shana! I've got my fingers crossed. :)

I have an Etsy store!

...well sorta. :) It's there, set up and ready to go, but nothing's on it yet. But still, it's exciting! Hopefully before the year's out I'll have a few goodies up for you to see (and buy)!

Monday, October 27

Blog Name Change!

First things first, I'm listening to my first Christmas song of the season! I know, it's not even Halloween. But it IS, however, like 30 degrees outside. So I'm justified.

In other news, I've changed my domain name to The Green Acorn. I figured Memoirs of a Bride doesn't really suite the purpose of this blog since I'm really focusing on my crafts. The Green Acorn is a good representation of my local area, nature, crafts, and will easily transition to an online store, should there be one in the future.

So don't be confused! It's all the same, just a new name. :)

Handmade: Stitch Markers

Rather than putting each new handmade idea in one enormously long post that gets lost in the archives, I'm just going to start a new post for each idea as I come to it. I'm not sure yet if I can get a categories sidebar or not... either way from here on out all the DIY accessories will start off as "Handmade: 'subject' ".

Today's handmade idea: Stitch markers!


Not-required-but-oh-so-helpful-prior-knowledge-to-have:
        A prior dabbling in jewelry making. A little know-how in this area will make this project easier.
        A familiarity with polymer clay. Again, it's not necessary, but knowing a little something about it (how it handles, fun ways to mix colors, etc.) will make the process smoother.

Materials:
        Polymer clay OR Beads from your local craft store
        Tiny glass beads (optional) to finish the look
        Drop earring posts (called head pins or eye pins) - these are basically straight pins with the point cut off. You'll use these to secure the marker to the ring.
        Split Rings - size to fit your needles.
        Needle-nose pliers or a set of jewelry making pliers

To Make:
        With your clay, fashion a marker however you'd like. Mind your size, though, you don't want too much added weight on your needles! Ideas? The sky's the limit! You can make anything! Hearts, dogs, circles, flowers, snowflakes, mittens, socks, cats, rabbits, squares, triangles, weird shapes that don't have a name, mushrooms, leaves, faces, candy corn, anything! Just have fun and go nuts. Nuts! You can make those, too.
        Carefully push your earring post through the bottom up through the top of your marker, stopping once the end is flush with the bottom of the marker. Now, you have two options here: you can find a way to suspend your markers while they bake so they won't get flat on one side, or you can lay them out on a cookie sheet so they will. My suggestion: lay them out. One flat side can actually be a benefit so that your markers lay flat against your knitting and don't flop around so much.
        Bake your markers (with post still in) according to the clay instructions. Take them out and let them cool. If you want, now's the time to add a little bead or two to the top of the marker. It's a pretty little touch.
        If your post is particularly long, you may want to snip a little off. Just leave enough length on there for the pliers to bend the tip into a circle.
        With your needle-nose pliers, pinch the very end of the post and slowly wrap the post around the tip of the needle. You should have a small circle that's not quite closed all the way. Take your "ring" and slip it through that opening. Almost done! Your marker should now look like a marker! All you need to do now is close that gap in the circle you made so your ring doesn't ever fall out. Simply pinch the ends together with your pliers and you're done!
        Now - if you'd rather have pretty beaded markers, throw out all the steps involving the clay, add your beads, and pick back up on the pliers step.

Friday, October 24

Handmade: Quaker Rib Afghan

This design can hardly be called my own since Quaker Ribbing has been around for eons. However, I've made it into a blanket whose stripes run opposite of your normal rib pattern. I think it's lovely.

Materials:
Any size yarn (I used Yarn Bee Luscious, a bulky weight - some of the most deliciously soft acrylic your fingers will ever feel!)
Circular Needles to match yarn size (I went with 8mm/US 11 circulars)
A cozy place to sit and enjoy!

Pattern:
Cast on as many stitches as you'd like for the length of your blanket. With my bulky yarn, I cast on between 100-150.
KNIT rows 1, 3, 5 and 6
PURL rows 2 and 4
KNIT rows 7, 9 and 11
PURL rows 8 and 10
KNIT rows 12 and 14
PURL row 13

Esentially,
K P K P K K
K P K P K
K P K

And repeat! 
Keep going till you've got yourself a nice sized blanket. And really, I do suggest this yarn. The pattern gets a little lost since the yarn has some flyaways, but it is so so snuggly soft.

Tuesday, October 21

Handmade: Creating Knitting Charts in Excel

Woah! This was a great read I found over at the Create Along blog. Wanting to make your own charts? Here's a fail-safe way to make that happen.

Someone's been a busy blogger today. Now it's time for bed. :)

Monday, October 20

Handmade: Fun Knitting Accessories to Make at Home

Most knitters I know have to plead with their dear husbands just to get a few skeins of yarn. But a few skeins of yarn, new needles, a spindle, a couple ounces of roving AND sock blockers? Don't make me laugh.


Not to fear, fellow knitters! Plato wasn't just knockin' around when he said necessity was the mother of invention. Being a newlywed and living off freelance work - it's not hard to imagine we're all but broke most of the time. :) So here we have it then, a fun little list of things to pick up at your local hardware store, guaranteed to provide you with years of delight as you work with your one-of-a-kind creations! Oh, and for pennies on the dollar.

Ahem:

NEEDLES WORTH BRAGGING ABOUT
You will need:
Dowel rod, choice of size (carry a needle gauge with you to find the
right match)
Any brand modeling clay that you bake to harden
Sandpaper
Wax Paper (optional)
Mineral Oil or Wood Oil (optional)
Wood Stain

To make:
Cut the dowel rods to suit your desired length. Using a knife or coarse sandpaper, shape the point of the needles, then follow up with a fine grade sandpaper to smooth out any snags or splinters. If you choose, stain the rods at this point. (If you do stain them, play it safe and let them dry overnight.) Next, rub the rods down with a wood oil and/or wax paper. This will polish it up nice and condition the wood.
Now for the fun part. :) To make the stopper at the other end of your needles, take your clay and fashion an end - any shape or color will do! I've seen acorns, balls, tear drop shapes, bells, the sky's the limit. Just don't make it too big otherwise you're hands will be begging for mercy halfway through your mother-in-law's Christmas scarf. After you have your shape, carefully push it onto the flat end of your needle, far enough down to make a good hole to which you will later glue the rod. (But not too far! You don't want your new needles poking out the end!)
Following the clay baking instructions, put the needles - rod, stopper and all in the oven with the stopper hanging over the edge of a baking sheet so it doesn't flatten out while it's cooking. Once they're done, give them some time to cool off. Remove the stopper from the needle, drop some good glue down in the hole you made (a tacky craft glue will do), reattach, let the glue harden up (overnight would be great) and tada! Needles worth bragging about.

*note: if you want to make dpns, shave off the other end to a point, smooth and oil it down, and you're set.

**Instructions taken from here


YOUR VERY OWN DROP SPINDLE (NOT AS BEAUTIFUL AS THESE FROM KNITTING IN COLOR BUT...)
You will need:
2 CDs
5/16" dowel rod, 12" long
Blind well nut (at Home Depot, the part number is 127253) - the brass threading must be safely cut off.
5/8" rubber grommet (Home Depot part no. 161788)
Eye Hook (can be found in picture hanging supplies)
Needle Nose Plyers (to open the eye hook a little so thread can move in and out easily)

To make: (Assembly instructions taken directly from here)
Press the rubber grommet into the center of the pair of cds and then insert the blind well nut into the grommet. There will be a groove between the blind well nut and the grommet where later, you will be able to attach a starter string.
We applied soft glycerine soap to the shaft of the spindle to facilitate insertion into the blind well nut. Keeping the 'groove above the grommet' on top, the point of the spindle was inserted from the upper side. The disks were pushed 1/4 of the way up the spindle to create a low whorl spindle. (for a high whorl spindle, keep the groove on the bottom and push the disks 3/4 of the way from the bottom of the spindle. The eye hook was inserted into the flat end at the top of the spindle.

P.S. The site where the instructions came from (linked above) also gives some great pointers on getting started with your new spindle. New to spinning? Check it out! As always, YouTube is an invaluable resource for us visual learners.


HOMEMADE WOODEN DROP SPINDLE
If I think to later, I'll actually write out the steps. In the meantime, however, just visit this link. It gives clear and detailed instructions on how to make a really neat drop spindle. I think I'm going to make it my next project.

YOU WILL NEED:
1/4" wood file
2 3/4" wood wheel w/ 3/8" hole
3/8" dowel rod
Wood saw
Ruler
   Hammer
Wood Glue
Pencil Sharpener or Knife
Sand paper, coarse to very fine
Fine steel wool
 Polyurethane Finish

A Wishlist

This is the best way I know of to keep track of all the wonderful things I see online that I would like to someday own. Blogger has a wishlist section, but users can only add items that are sold online with a direct link. While that's great, I can't add obscure items like "Heather grey sock yarn" and such. So here I go (in no particular order)! Hope you're reading, Mom! :)

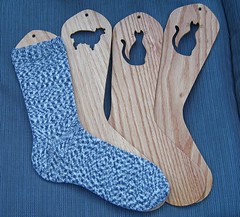
  • A pair of wooden sock blockers (like these) with my initials burned in by the lovely Miss Sisk. :)
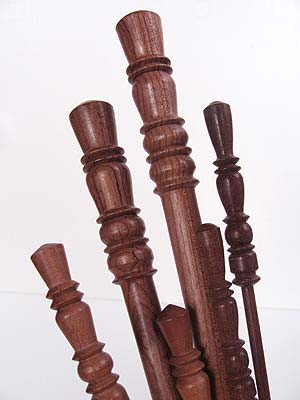
  • A pair of fun knitting needles. The ones I have now work, but they're not special. :) Hobby Lobby sells some really lovely dark wooden needles, like these which are Surina wooden needles. Any size is fine!
  • The book "Start Spinning: Everything You Need to Know to Make Great Yarn" (check out Amazon)
  • Roving! A must for any spinner. I know, I know, I'm not a spinner yet, but that's where you come in. :) Romney, Corriedale, Coopworth and Shetland are all good types of roving for new spinners (Like the Romney roving found on this page). Anything from 1-10 ounces would be great! As for color, a white or cream so I can dye it. 
  • Wilton Cake Icing - for dying my homespun yarns! Any and all colors are welcome. :)
  • A mannequin head - to model my hats. Oh, and maybe it can be attached to a bust to model scarves and sweaters? Who knows. Maybe a shop somewhere is going out of business. :)
  • A wooden yarn winder
  • "The Gentle Art of Domesticity" by Jane Brocket - it's amazing.